Scan Document (Source)
Vertex can be configured to receive scans from multiple devices within your network.
The available scanners are configured by your facilities System Administrator.
To scan into the workstation:
1. Place the document to be scanned on the scanning bed or feeder according to the device’s instructions.
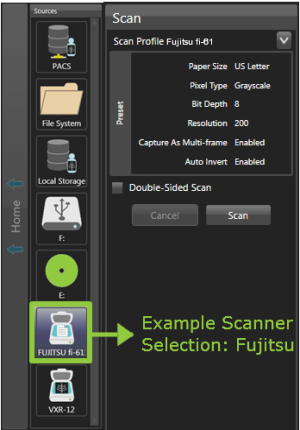
2. Select the scanning device in the Sources Column.
|
|
Your scanner's default settings are configured by your facilities System Administrator.
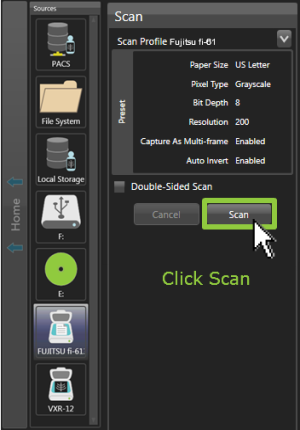
To use all default settings, click scan and your document will appear in the Source Browser column.
Customize Your Scanned Document:
In the scan settings screen that appears in the Source Browser column, click the Scan Profile drop down menu and select Custom.
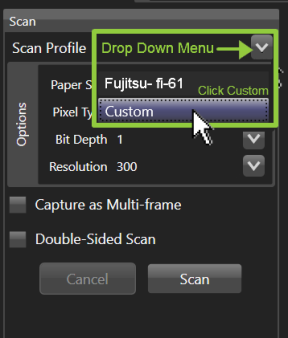
Scan Profile Menu
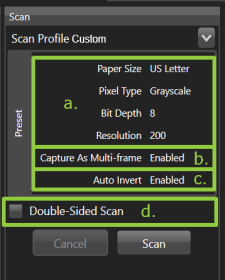
a. Choose from preset options in the drop down menus:
- Paper Size
- Pixel Type
- Bit Depth
- Resolution
b. Capture As Multi-frame: Capture multiple images into one DICOM object
- Enabled (On): Multiple images will be one DICOM image
- Disabled (Off): Multiple images will be captured as multiple DICOM images
c. Auto Invert: Invert colors of scanned document- White page with black font will invert to black page with white font
- Enabled (On): Image color will automatically be inverted
- Disabled (Off): Image color will be the same as scan
d. Double-Sided Scan: Duplex scanner is scanning 2-sided document
- Checked: Yes scan 2-sides / Option ON
- No Check: Option OFF
*NOTE: Functionality may vary by device, and scan presets may have been configured in advance by your facility’s systems administrator.
3. Click Scan in the Source Browser Column.
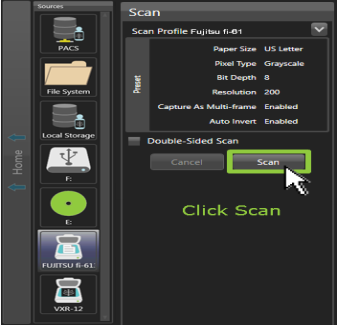
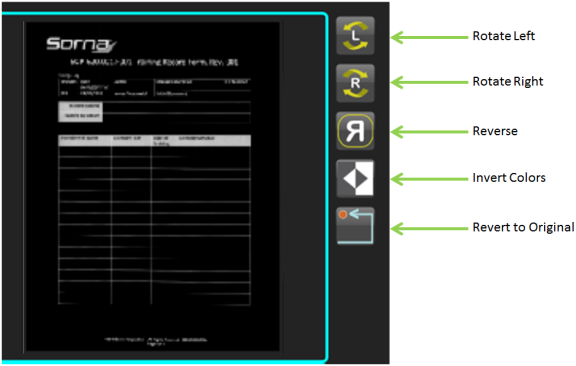
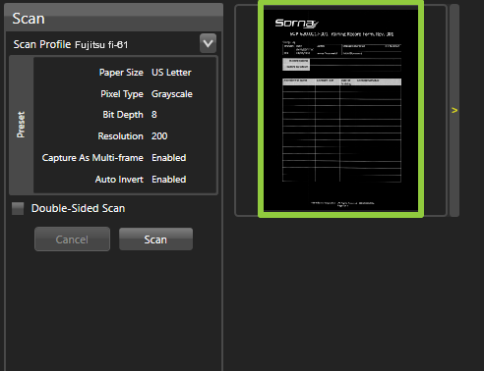
4. Confirm the scan preview in the Results Column
(preview provided in example has the Auto Invert Enabled)
*NOTE: The above steps can only be completed using devices configured to communicate with the workstation by your facility’s systems administrator.
Modify Scanned Image
Mouse over the image in the Results Column and hover until the Edit Panel appears.
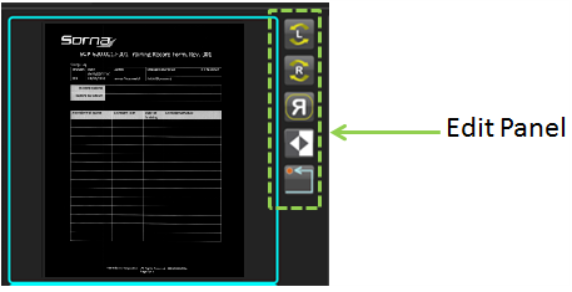
Modify the scan by selecting from the following options in the Edit Panel:
